|
This article has been first publishedin the November 2004 issue (no 15) of French woodworking magazine Couleurs Bois.
It was the third paper about hollowing tools I wrote in this magazine. The first one was about the Termite, and the second one aboutKelton scrapers.
Kiwi hollowing
|
"Kiwi" stands for New-Zealander, as that's the origin of both tools I've chosen to describe this time. I'm going to discuss about both the Woodcut Proforme, and the tool developed by woodturner Rolly Munro, as they are quite similar in their principles.
|
|
Tool presentation
|
Both tools use a cutting head with a depth limiter, held in a steel shaft. Bigger than Kelton scrapers, their heads need a wider opening for hollowing (around 3 cm, 1 1/4 inch).
|
|

|
The Proforme cutter has a 'J' shape, whose end is sharpened.
|

|
|

|
The shaft, which is available in straight, slightly canted, or swan neck versions, is held by 2 screws in a metallic handle.
|
|
The "Munro" is based on a round "cup-cutter", screwed on an articulated head, allowing to adjust the position depending on the hollowing location. The shaft is maintained by a big phenolic knob in the aluminium handle with EVA sleeve.Its light weight can appear as a little disturbing at first , however I find it very comfortable when used over a long period of time. If needed, it can be filled with lead shot as it is hollow.
|
|

|

|

|
|
Different configurations of the head, depending on links used.
|
The depth limiter
|

|

|
Placed above the cutter, its position can be adjusted to modify cutter exposure, allowing deep or fine cuts,
|
|
or to partly mask the cutting edge, to use only a precise zone during hollowing
(the tough job being to find the right adjustment).
|

|

|
|
One needs to start with a very small exposure (a few tenth of mm).
|
If it is too big, the cutting effort will push the head downwards, then too much wood is taken at a time and the catch is not far.
|
|

|

|

|

|
|
Moreover, the risk of shavings packing up in the head is increased.
It's especially true for the Proforme. The Munro is less sensitive: the shaving has a natural tendency to roll up, so to exit upwards. In the Munro, the exit is on top of the head, it works fine. In the Proforme, it's on the bottom/side, and the shaving is blocked upwards by the limiter. If the flow is too important, shavings don't exit fast enough and pack up. If you feel the tool is not cutting anymore, that's something to check.
A trick: a bigger vertical gap between the cutting edge and the gauge is good for better shavings exit. So the more you sharpen the cutter, the better it works. On a brand new tool, a very thin washer (a few 10ths of mm) between the head and the gauge will have a positive effect. As usual, you need to frequently remove the shavings inside a hollow form, otherwise they will jam in the cutting head.
|
Sharpening
|
The diamond stone is best for the Proforme. The Munro comes with a well thought jig (detailed in the user manual) to be used with a grinder (wet or dry). The cutter is screwed on it, and pressed against the spinning wheel of the grinder.
|
The tools in use
|
Both tools are suited for end grain as well as cross grain. The swan neck version of the Proforme (the one I have) works well in quite flat pieces, but not too deep (think of a flying saucer), or it would need a certain width so one can move it inside the piece (as an example, the shape of the cade hollow form in the last article can't be done with just this tool, one would need to use also straight versions).
The Munro will not be so much at ease when hollowing sidewise far away from the opening, but it works very well in all other kind of shapes.
As with all canted tools, one need to pay attention to the position of the toolrest (placed before the curve of the tool), and be very careful when the tool is entering or exiting the piece: it's easy to catch the opening, and have the tool pulled away from your hands by the rotating piece, or even the piece coming out of the chuck and resting freely on the tool.
These tools work also very well for cutting under rolled edges of bowls or boxes.
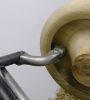
One work at axis height, with the tool held more or less horizontally, at a rather slow speed (don't hesitate to go down to 300 rpm). To start cutting, you can "rub the bevel" with the depth gauge, then rotate gently the tool clockwise, until it starts to cut. If you can't find the cut, try to modify the position of the head with regards to the wood, by rolling the tool on the toolrest, or moving the handle up or down, until it "bites" the wood..
|
Turning a box
|
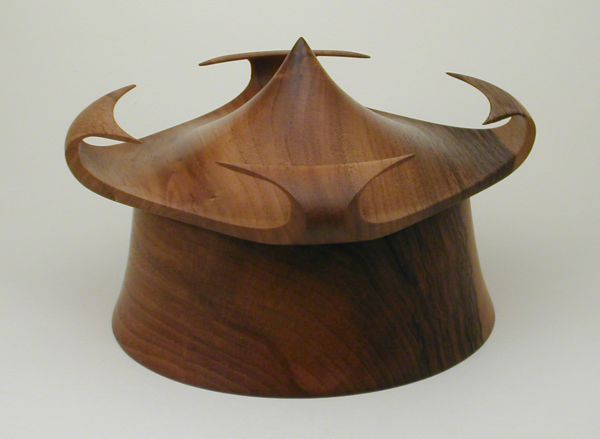
Let's turn a box, whose shape has some kind of Asian inspiration. Several hollowing configurations will be practiced here: easy at first for the box body, and a bit more complicated for the lid.
|
The box
|
|

|
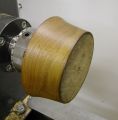
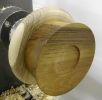
I start with a walnut disk (17*7 cm, 6 5/8* 2 3/4") on a screw chuck. I turn the outside, and the bottom (slightly concave to lay flat) with a recess for my chuck. I completely sand it and apply my finish (oil).
|

|
|
|
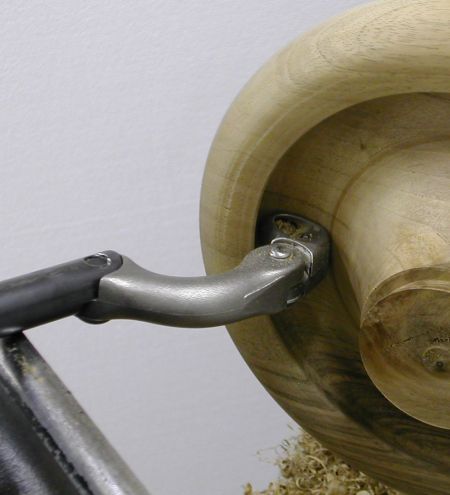
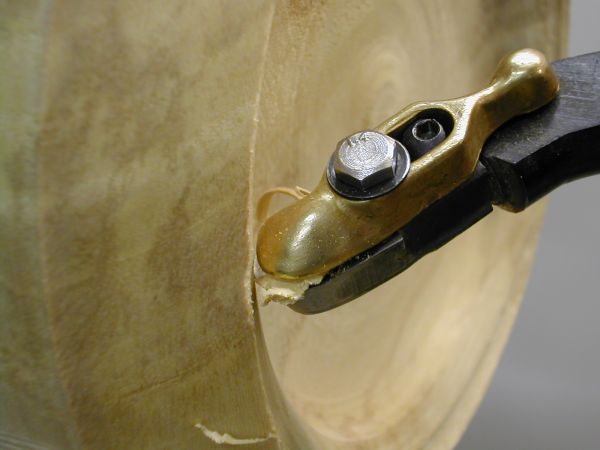
I rechuck the piece with the recess, and after having trued the face, I start hollowing.
|
|
A shape like this could be done with a bowl gouge or a bedan (with the difficulty in the bottom corner), but it's a good exercise with hollowing tools:
|

|

|
|
One can easily see what's happening, accumulation of shavings is not an annoyance (and it's easier to take pictures!). I used alternatively the Proforme or the Munro.
|
|

|
On the latter, the shaft is exposed out of the handle of "just what is needed".
I hollow with the end of the tool, with a big cutter exposure to remove a big amount of wood.
When most of the hollowing is done, I decrease the exposure to allow very fine cuts - it can be seen on shavings size - and make the final pass on the bottom and sides.
|
|
.")
|
The shape of both heads gives a good access in the bottom angle.
As sanding is not my favorite activity, and this shape is especially suitable, I use a power sanding pad (Skilton) in my drill. Slow speed of the lathe and dust collection are a must.
|

|

|
The lid
|
I turn a "sombrero", whose sides will be cut afterwards. The exercise is all about having a rolled rim, more or less important (maximum width = max diameter of the lid x 0,14).
|
|

|
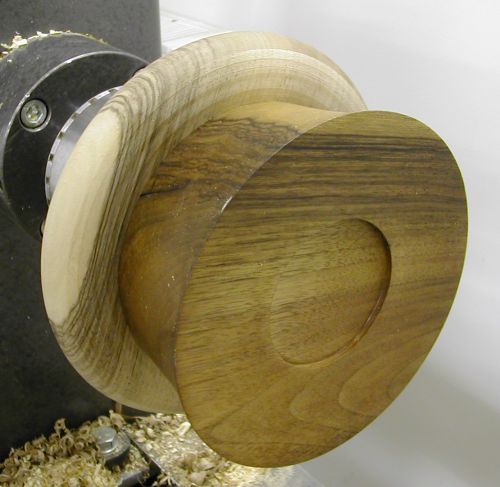
The principle is the same as in a closed shape hollow form. I take a new blank, round it, and turn a tenon which will be useful when turning under the lid.
then I can turn the outside shape, and hollow under the rim:
|

|

|
|

|
it must have an even (or regularly increasing) thickness, because you will see it when the sides will be removed. By adjusting the depth gauges, I first work just under the edge (left side of the cutter), then I cut further to the left (tip of the cutter). Take care: if the rim is too much rolled over, there is a dead space the Proforme can't reach.
|
|
|
I give a last cut with the gouge on the outside, following carefully the internal profile. I can sand this part now, though the "tip" of the hat will be turned later to remove the tenon.
|
|
The lid is now flipped over, and I turn a spigot, whose diameter is exactly the inside diameter of the box.
|

|

|
|
|
Then I hollow under the tip, and sand to a finish.
|

|

|

|

|
|
I rechuck the box, and jam fit the lid on the box (that's why it was important to have a tight fit between both), and I finish turning the tip with a 10mm bowl gouge.
|
|
I adjust the bandsaw parallel guide, to cut just a bit more than the width of the rim. Then with the 90° guide I cut the second side, with the parallel guide at the same setting. Then I adjust it to cut the two remaining sides.
|
|

|

|

|

|
|

|
Now you just need to sand the edges, and possibly fine tune the inside of the "ears".
With the lathe stopped of course, it's quite brittle and it bites !
|
|
Last update: 05/03/2009
© Pascal Oudet 2004-2009. Reproduction and use, even partial, are forbidden without express written permission.
|


.")