|
This article has been translated from one which originally appeared in the September 2004 issue (no 14) of French woodworking magazine Couleurs Bois.
It is the second in a series about hollowing tools. The first one was about the Termite.
The 3 brothers
|
After the Termite, well suited for open shapes turned end grain, I chose this time another family in the range of hollowing tools. Kelton tools, made in New-Zealand, fit within the family of scrapers. They are easy to use, and are more intended for closed shapes.
|
|
Presentation
|

|
They enable to hollow very efficiently, and leave a very clean surface, in end-grain or cross-grain wood (in this last case, it is better to choose a close-grained wood, to avoid tearout due to scraping).
They are sold as sets of three tools (straight, slightly curved, more curved), whose complementary shapes are well suited for hollow forms with small openings: the cutting head is not wider than the tool shank, which allows the smallest openings (if you want to compete with David Ellsworth, the master of this kind of pieces).
|
|
There are four sets of different lengths and diameters available :
- Mini : 22 cm x 5/16 inch (8 mm)
- Small : 23 cm x 1/2” (13 mm)
- Medium : 38 cm x 5/8” (16 mm)
- Large : 50 cm x 3/4” (19 mm)
The small one works up to 15 cm (6") depth without vibrations. These tools are sold without handle: Kelton offers several steel handles, each having two end openings: 8 and 9,5 mm (5/16 and 3/8"), 13 and 16 (1/2 and 5/8"), or 16 and 19 (5/8 and 3/4"). Just one handle per set is enough, swapping from one tool to the other is very quick. But you can of course turn a wooden handle for each tool (metric users: take care with the imperial measurements when drilling).
|

|
The cutting part is made out of a special alloy.
One can use the end and both sides of the tip for hollowing.
|
|
The left one will be especially used for sides and finishing. The right one, when cutting from left to right, will allow to remove the small nib which always remains in the center of a piece.
|
Sharpening
It is done with a diamond stone, the grinding wheel must be avoided to avoid removing too much of the precious special alloy. Sharpen only along the bevel, no need to touch the horizontal part. The tool is more efficient (and leaves a better finish) with a raised burr as with a classical scraper, but this is not mandatory.
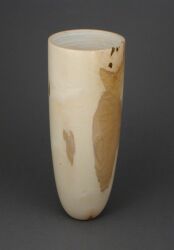
Turning a hollow form
I chose a nice piece of cade (Juniperus Oxycedrus): it leaves a pleasant smell in the shop, and shavings/dust can be burnt as incense. I will use the small tools, so I shoot for an opening of 13 mm (a little more than 1/2"), and a height of 150 mm (6"). I draw some sketches on paper, and find a shapes which pleases me. Its maximum diameter is 95 mm (3 3/4").
The outside
|

|
I rough my piece of wood between centers, then turn a dovetail spigot for the chuck. I draw on the cylinder the total height, and the position of maximum diameter.
I turn the shape of the top, then the bottom, but I keep enough wood in the bottom to not weaken the piece. Apart from this area, the outside must have its final shape, to allow precise thickness measurements during hollowing.
|

|
|
Unless you are contortionist, it's always difficult to evaluate the shape with the piece on the lathe, so I unscrew the chuck from the headstock, to better judge the shape in the real position.
|
|

|

|

|
|
With a small detail gouge, I define the 13mm opening, presenting the gouge with both wings vertical to each other. Otherwise, the gouge will travel to the left or to the right when it will touch the wood..
|

|
|
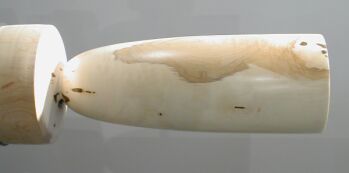
I choose a hammered texture for this piece, so I sand to a finish and apply hammering now: once the piece will be hollowed, the risk would be very high to break it during this operation.
|
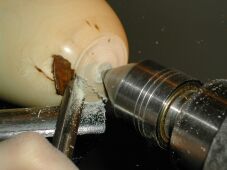
Hollowing
|

|
I drill a center hole which will be used as a depth indicator, by pushing a 10 mm (3/8") gouge (or the straight scraper) just in the center. A mark with white masking fluid on the tool shows the desired depth (it is easily removed, and doesn't leave glue like scotch tape).
|
|
You need to pull back the tool very often to remove the shavings.
|

|
|
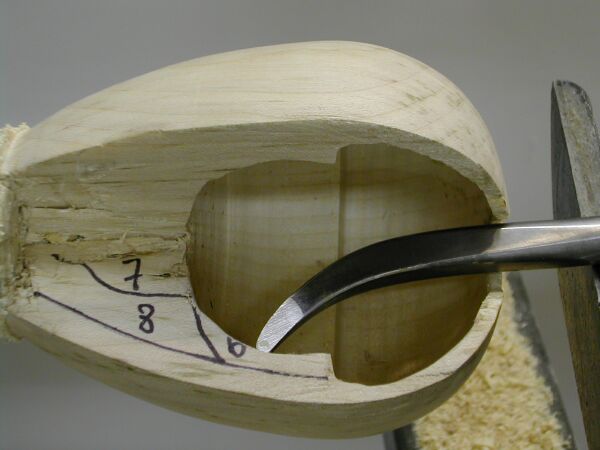
(I turned another piece in maple for cross section views).
|
|

|

|

|
|
Hollowing is made step by step, with the appropriate tool each time. I start from the top, and keep a maximum of wood in the bottom to not weaken the piece.
|
I first take the straight tool. I will widen the central hole in the first centimeters, with the left part of the tip cutting at 9 o'clock.
|
|

|
The tool is horizontal or slightly plunging. Speed is 700 rpm. The tool is slightly askew (to the left), as cutting effort tend to bring it back to the center. If you feel the tool is too much aggressive, you just need to roll the tool on its left.
A big problem with this kind of hollowing is the accumulation of shavings : the small opening prevents them to come out, they have a trend to pack and to grab the tool. It's time to clean them if you feel the tool is "navigating" in the piece: a blow of compressed air, a bent wire, a vacuum or just a McDonalds straw (to blow, not to breathe in!) will do the job.
|
|
|
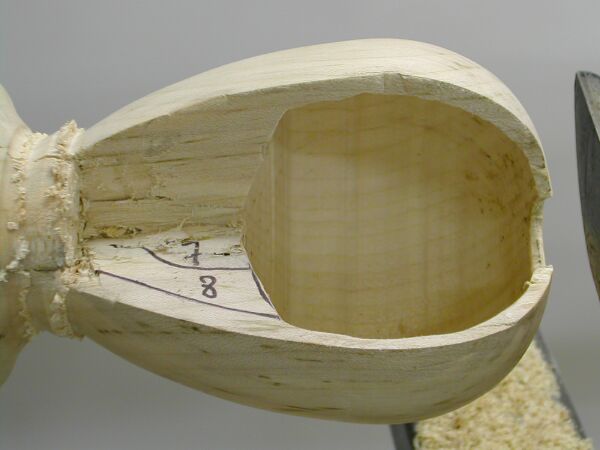
So that shavings are no so annoying, you need to make room for them: it means widening the hollow part at the top of the piece. When I feel that the straight tool is no more suitable, I take the slightly canted tool.
Take care to the position of the toolrest: it needs to be pulled back before the curved part of the shaft, so that the handle, the contact on the toolrest, and the cutting point are aligned. Otherwise the cutting effort will tend to rotate the tool.
|

|
|

|

|
|
The principle is the same than with the straight scraper: I widen the area around the opening, without hollowing too deep (zone 2). One can work by pushing or pulling, with any part of the cutting tip. When you pull the tool out of the piece, take care to follow the curve of the tool to avoid catching (and damaging) the opening.
|
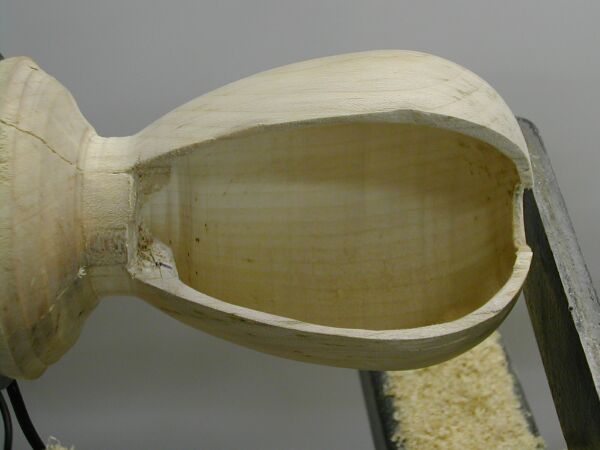
When this tool does not go far enough, I take the more curved one. For the top part of the piece, I'm working with the left side of the tip, slightly tilted, and pushing to go with the grain. With the raised burr on the edge, the surface is cleanly cut and doesn't need to be sanded (anyway, the opening is too small to check this with a finger !)
|
|
As I don't see what I'm doing, I need to take care to all feelings than come back from the tool: small ridges in the wood, noise. Just like a blind man with his stick.
It is very important to check wall thickness regularly : The tools cut very efficiently, don't get carried away and break through the side.
|
|

|
Some special (expensive) calipers are available on the market, I took a bent piece of 4mm wire, with rounded ends to avoid scratching the wood. It is flexible enough to be introduced in the hollow form, while keeping between both ends the gap I've adjusted. This gap is slightly greater than the desired thickness. Both ends must be perpendicular to the surface of the wood to give an accurate measurement.
|

|
|
When this part is completed, I go deeper, repeating the same progression of tools (zones 4,5,6)
|
|

|
|
|
|
The again in the bottom, only the first 2 tools are needed. A final finishing cut is done with the tool rolled on its side.
|
|

|
|
|
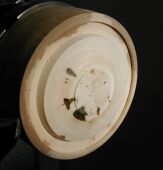
Finishing the base.
|
After having verified the depth, I finish turning the profile of the base. I part off the piece, and finish the bottom, either by hand, or on the lathe with a jam chuck adapted to the opening. Hammering is completed by hand.
|

|
Last update: 28/10/2004
© Pascal Oudet 2004. Reproduction and use, even partial, are forbidden without express written permission. |