|
Turning of a "trembleur" (trembler, wobbler)
This page describes how to use a string steady rest to turn a trembleur, which is a long and thin piece of spindle turning.
I've written it after looking for instructions on the web on how to make one, without any success.
Some of these pictures have been taken during a craft fair in "la Roche sur Foron" (France, 74), others have been taken afterwards to show some details (which explains you will see there are actually two different pieces).
This trembleur is only about 20 cm long (8 inches), but experts are able to make some more than 1 meter long.
You just need to use enough steady rests, and have solid nerves.
|
|
Start by turning a cylinder between centers. Take a fine grain hardwood like boxwood or holly. If it is green wood, it will be easier to turn, more flexible so is more forgiving, and can produce interesting effects when drying (but I don't believe it is the traditional way).
Then hold this cylinder in your chuck with long jaws.
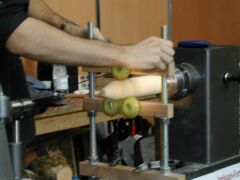
If you have too much vibrations, you can use a classical steady rest.
(Sorry for the picture, I think the photographer needs a steady rest too)
|
|
|
This one was made with 3 roller blades wheels and bearings, 18mm threaded rods and 3 pieces of hardwood.
Commercial one are available on the market (from Oneway for example), but it's much more expensive (around 100 Euros).
The left picture shows a better view, use when turning a deep vase. The original design comes from Herm de Vries .
|
|
|
|
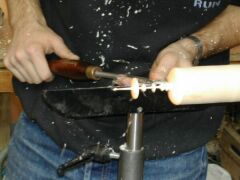
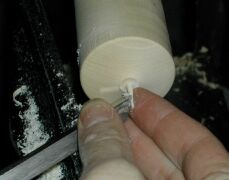
You can use a bedan or a spindle gouge, and use your fingers to help stabilizing.
|
|
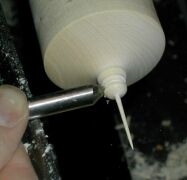
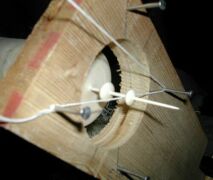
The needle is 1 mm diameter, followed by a small bead.
|
|
|

|
Here I removed the steady rest as it was in the way of my tool rest.
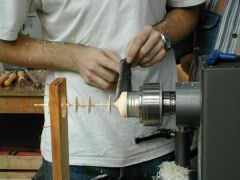
You can turn all kind of shapes, heavier ones generating more vibrations. Here, the wood is green holly, so I played with thinness, expecting deformations. The first disk is less then 1mm thick, and axis is around 2 mm (3/32") diameter. It must remain the same on all the piece, so don't start to thin if you don't feel confident (or if you drunk too much coffee). If sanding is necessary, do it as you turn: you can't come back later because of vibrations (and warping if using green wood).
|
|
|
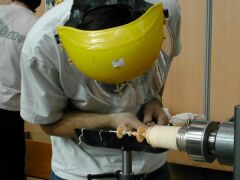
Work in progress. Keep relax, turn gently, taking very light cuts (with sharp tools of course). Take a rest from time to time.
Here, I'm feeling the steady rest will soon be necessary, as the end of the finial is starting to wobble.
|
|
|
|
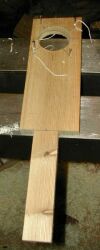
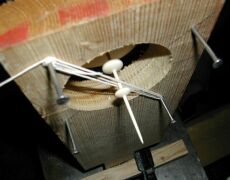
Overall view of the steady rest. Difficult to make it easier. Take a board, draw a circle with 2 diameters at 90 degrees. Also draw horizontal and vertical diameters. Cut the circle, and place 4 nails on the diagonals.
|
|
|
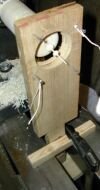
Align the steady rest with the piece, with the help of the horizontal and vertical marks. I glue a scrap stick to it (I draw the position, apply CA glue to the rest and spray accelerator to the stick), and clamp the assembly to the lathe bed.
With glue it's easy to change the position if working with different lathes and center heights.
|
|
|
|
|
|
|
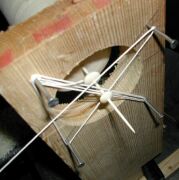
Beginning of the wiring: from top left to bottom right and back, around the needle.
|
This step is done twice.
|
Then bottom left to top right and back, twice again. Then again to top right
|
|
|
Then a half turn around the piece, and back to top. Don't pull too much on the string to avoid bending the fragile work.
|
And the same between bottom left and center.
|
A small knot and that's it.
Longer to write than to do.
|
|
|
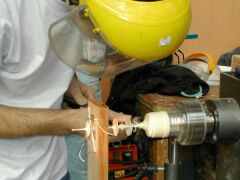
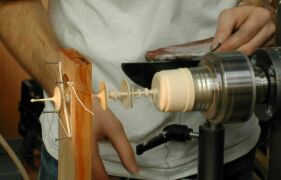
The string steady rest is setup. It's amazing how you feel comfortable when you have placed it. You really feel you are turning safely, without taking the risk to break the piece.
|
|
|
|
|
|
Final sanding. If you want to cut the piece on the lathe, request some help, or do it with the lathe stopped. It would be a shame to break it now !
|

|
|
Photos by Aurélie Branche
Last update: 16/02/2004 |
