|
This article has been translated from an original one I wrote for the July 2004 issue (no 13) of Couleurs Bois (French woodworking magazine).
It is the first in a series about hollowing tools. Each article describes a tool and its use in the making of a turned piece.
The Lord of the Rings
The tool
|
|
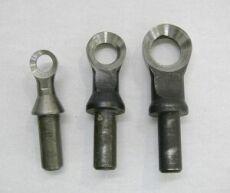
The Termite is a tool made by Canadian manufacturer Oneway. It is derived from the classical ring, but I find it much easier to use.
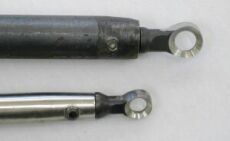
The ring is available in three diameters (9.5, 12 and 15mm), and is maintained in a shaft.
The rings are small enough to be not too much aggressive, and thus minimize catch and dig-in risks.
|
|
|
A low cost solution is to buy just the rings, and mount them on a home made tool. (instruction here on how to do that). A bigger diameter shaft will allow hollowing to greater depths without vibrations.
|
|
|
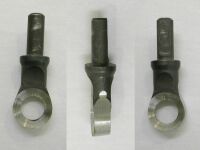
The ring is cutting on its 2 faces, and has 2 bevels, acute and obtuse. The obtuse face (whose cutting part is of smaller diameter) is used for hollowing on the sides (so most of the time). The acute face (bigger diameter) is the most aggressive, and is used almost only for bottom of pieces.
|
Sharpening
|
|
|
|
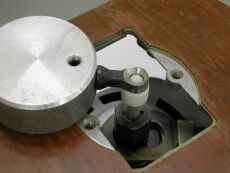
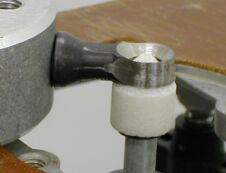
Sharpening is done with a conical grinding bit (sold with the tool), which is held in a router with a 1/4" (6.35mm) collet. You can also use a drill, but speed is a bit low and positioning is not so easy. The router is placed "upside down". The ring is held in an aluminum jig (small cylinder), which is lying flat on the base. You need to adjust the height so that the cone of the bit is tangent to the inside of the ring. You then just need to move the jig in a gentle circular motion. If needed, a light touch with a diamond stone is enough for the outside.
|
Turning a deep vase
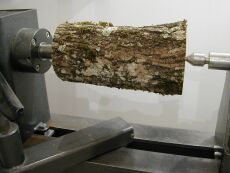
The Termite is well adapted for end-grain hollowing. You can use it cross-grain, but the resulting surface will not be as good. Shavings will also have a higher tendency to clogging . It performs especially well in open shapes, flared or straight (box, mortars, vases). In closed shapes, it's difficult to maintain a good position of the tool. So I have chosen a tall vase shape, and I found a piece a field maple (acer campestre) which should suit. Its dimensions are 10*25 cm (4*10"), for a finished piece which measures 8.5*23cm (3 3/8 * 9"). Take care if you take a log, the pith can cause cracks and checks problems.
The outside.
|
|
|
|
|
I start by roughing the log between centers. You can start to establish the shape, but no need to go too far, as it will probably be out of round when you will put it in the chuck.
|
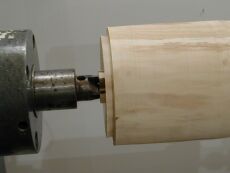
I turn a dovetail tenon for the chuck.
|
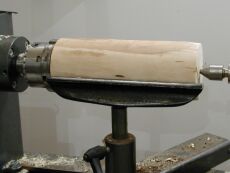
The piece is held in the chuck, but for the moment, I left the live center for safety reasons. It also allows to minimize vibrations, which are often a problem with these tall shapes. I turn the cylinder back to round, and I can start to rough the outside shape. Speed is 1200 rpm.
|
|
If the shape is flared, you need to take care to leave enough wood at the headstock side, to not weaken the piece. So here I don't go down to the final shape, otherwise I will have vibrations problems during hollowing. I can come back to this part later. (when turning green wood or very thin, it is better to sand and finish now: thinness or warping would make these operations difficult later).
|
Hollowing.
The tailstock is moved away. Don't forget to remove the live center, it's quite painful when it comes too close to the elbow (and the position with the Termite makes this kind of meeting quite probable).
|
|
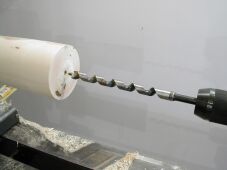
I start by drilling a hole in the center, which I use as a depth gauge. It also facilitate starting the cut with the ring..
Here I'm using a 14mm drill held in a Jacobs chuck in the tailstock. Speed is very slow to minimize heating.
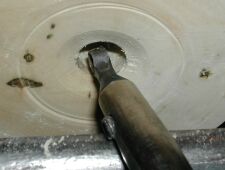
The pilot hole being done, I start with the Termite. I'm using the small diameter of the 12mm ring, but it's better to start with the 9mm one, taking time to master the technique.
|
|
|
|
|
|
The speed is quite low (700 rpm), the toolrest is set so that the tool is horizontal.
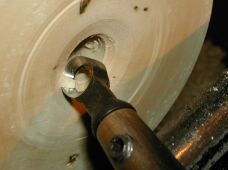
I'm cutting with the small diameter, which is on the left on the picture. I always start with the ring in vertical position (so it doesn't cut), just a few millimeters deep in the pilot hole.
|
I gently rotate the tool clockwise. The low side of the ring is starting to cut. The ring's orientation is "1 o'clock". The more I rotate it, the higher the cutting depth (and thus the risk of catch).
An orientation around "2 o'clock" is good.
|
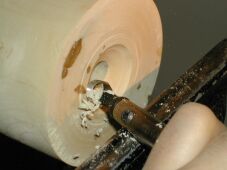
Once I've started the shaving, I move the ring towards the outside, by pulling it with my left hand. This hand is guiding the tool, the fingers maintaining the tool against the wood while pulling it towards me.
|
|
You always need to start this way: if you start "at 3 o'clock" (horizontal) the dig-in is guaranteed. Following this principle, I increase the diameter, but I keep a margin on the wall thickness, which will be useful for 2 or 3 finishing cuts.
|
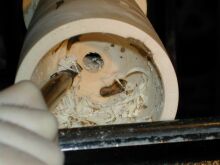
|
I continue hollowing deeper. for a better control, I settle the handle under my armpit, and use my hand on the toolrest as a pivot point. It allows me to rapidly increase the diameter of the central hole. Then I start from the bottom of the part I've just completed to clean the side..
|
|
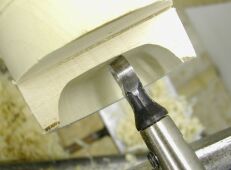
|
The commercial shaft works approximately up to 17cm (7") deep without vibrations, so I take the home made shaft for the end. Once I reach the final depth, I need to use the other bevel, since the obtuse one prevents the cut.
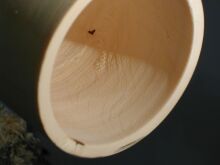
So I will cut with the bigger diameter side of the ring. Once again, I start vertically and rotate the tool. With my left end, I pull the tool from center to the outside. Attention: once I get close to the walls, the tool with its bigger diameter offers ideal catch conditions, so I rotate it counter-clockwise to decrease cutting depth and get a very light cut.
|
|
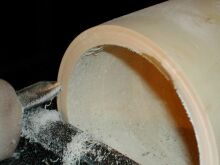
|
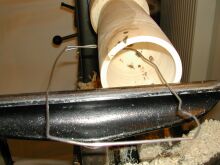
|
|
|
The edge might have been damaged during hollowing, so I don't forget to clean it with a sharp spindle gouge.
|
I check that the thickness is what I want.
|
Without cutting, I repeat the motion of the final cut, to verify the toolrest won't disturb me and that my body position is correct, then I execute one or two finishing cuts from the bottom to the edge, in a continuous, uninterrupted motion.. No room for a catch there !
|
|
Now I only have to sand and apply the finish to the inside. Sandpaper and foam wrapped around a wooden stick will help reaching the bottom, but take care: the stick can be pulled off your hand by the spinning vase.
|
Finishing the outside.
|
|
|
|
|
|
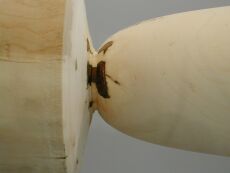
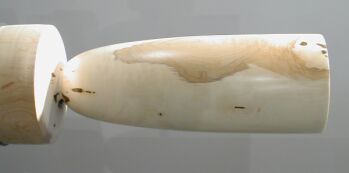
I finish shaping the outside, and I start the cut where I will part off the vase (after I have verified the hollowing depth))
|
I sand and apply the finish (sanding sealer + wax), then I part off the vase with a small saw (lathe stopped).
|
|
|
|
|
|
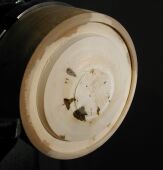
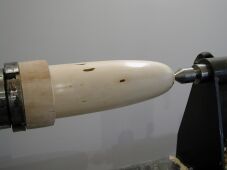
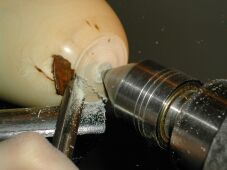
Nothing more deceiving than a piece, whose bottom is not properly finished. So I use the scrap that was left in the chuck to turn a jam chuck with a tenon fitting to the inside of the vase. I keep the vase in place with a light pressure from the tailstock, and with a sharp gouge, finish the bottom.
|
|

|
I found the inside was quite plain, so I decorated it with grooves and white paint (gesso).
|
Last update 20/09/2004
© Pascal Oudet 2004. Reproduction and use, even partial, are forbidden without express written permission. |
